How To Start Your Own Spiritual Blog (Or ANY Blog) In 3 Simple Steps
by Gregg Prescott, M.S.
Founder, Webmaster, & Editor, In5D.com
Has anyone ever told you, “You should have a blog!”? Have you ever wanted a website of your own to post your amazing ideas and thoughts but you weren’t sure how to do it? Look no further because after reading this, you’ll be able to start your own blog in three easy steps!
All you need to do is put aside a few minutes to read this article and before you know it, you’ll be writing and sharing your first article on the internet.
It’s as easy as ready, set, GO!!!
Disclaimer: Please note that some of the links below are affiliate links and I will earn a commission if you purchase from those links.
STEP 1: DOMAIN NAME AND HOSTING
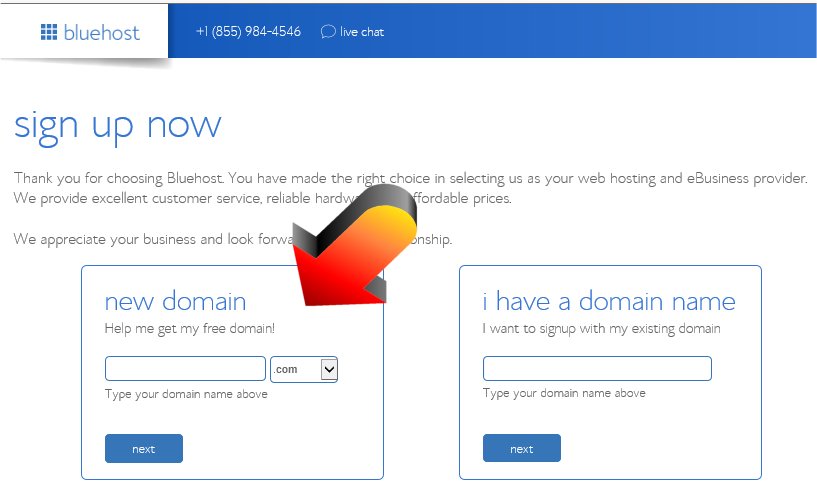
The first thing you’ll need to do is to create a catchy URL (website name) that is easy for people to remember and spell. Make a list of potential website names and be creative! Then, go to Hostgator, Bluehost, etc… and check to see if the URL is available.
Tip 1: If possible, have one of your website’s keywords in the URL. For example, if your website is about gardening, try to incorporate the word “garden” or “gardening” into your website URL (e.g. www.GuardingTheGarden.com). By doing so, your website will get ranked higher and quicker by Google for having a key search word in the title of your website.
Tip 2: Don’t use dashes in your URL (e.g. www.guarding-the-garden.com vs. www.GuardingTheGarden.com). The use of dashes makes it more difficult for people to find your website.
You’ll need a hosting service in order to get your website online. While there are a number of inexpensive hosting businesses, I would recommend either one of these companies, Hostgator or Bluehost.

Due to the size of my website (3+ million visitors per month and growing), I’m currently using a dedicated server but if you’re just starting out, all you’ll need is a minimal package.
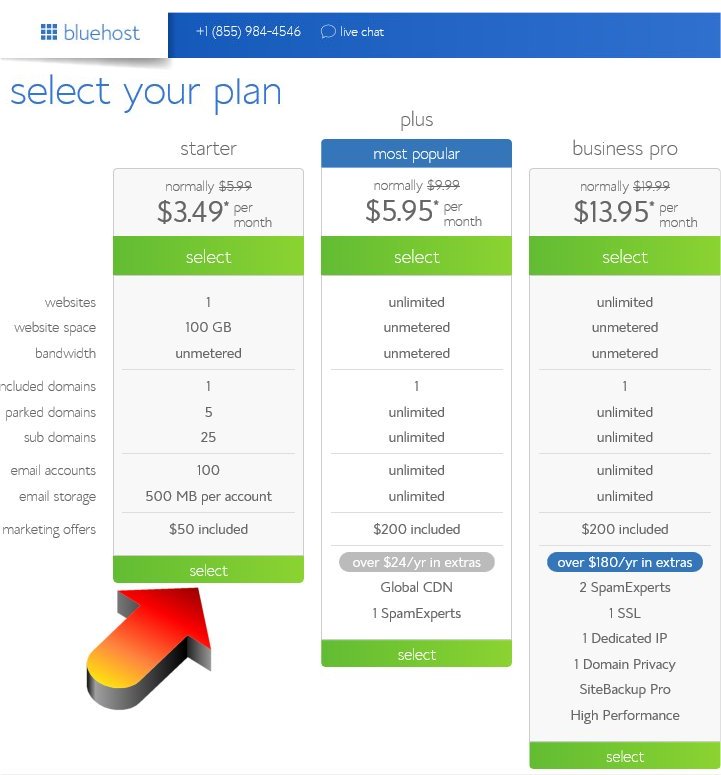
For example, Bluehost has a package as low as $3.49 per month that includes a free URL (domain name) with your purchase. The lowest prices on any server package will involve paying it in one lump sum versus monthly payments. Regardless of which package you choose, you’ll save a nice chunk of change by paying an annual price for your server, so keep that in mind.
Tip 3: One thing you may want to consider is how much traffic your website will receive. The smallest package on Bluehost covers 100 GB of website space, which is more than enough for most people just starting out. The downside of having limited website space is that if an article that you write goes viral on social networking, then your server will not be able to handle the influx of traffic and will most likely stall or time out when people try to visit your website. You can always upgrade to a different plan as your website grows.
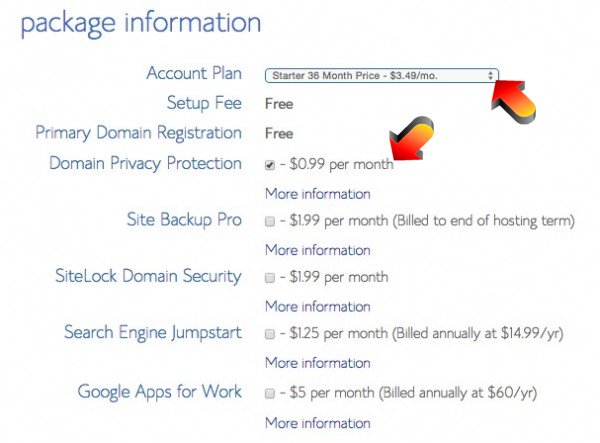
Tip 4: If you don’t want your address and phone number listed to the public when you register your domain, then select the option for privacy when registering your website URL.
As your website grows, you’ll need a bigger server package to handle an increase in traffic and may want to try the Developer Package or switching to a VPS Server, but that’s down the road! Right now, just about everyone can get away with using a smaller package when you are starting your first website.
STEP 2: WORDPRESS INSTALLATION
To Install WordPress on Bluehost:
Login to your Bluehost account and Click on hosting at the top, to get inside cPanel. Scroll down to Website Builders> Select WordPress from the list, and it will take you to the next page. On the next screen click on Start in front of WordPress installation pop-up.
To Install WordPress on Hostgator:
The first step to install WP in your Hostgator cpanel, is to login to your cPanel account of course, then scroll down until you see the Quick Install icon. Then it’s just a matter of following the steps in the video. A WordPress installation is made so easy using Quick Install, it’s literally 2 steps and you are done.
Tip 5: Be sure to write down your username and password place it in a safe spot!
STEP 3: MAKING YOUR WEBSITE ATTRACTIVE
As of this point, you officially have a running website, CONGRATULATIONS!
Now comes the fun part… picking out your theme!
There are a number of free themes provided by WordPress that you can use, but the nicest ones seem to be “Premium” themes, which generally cost $50 or less per theme.
There are numerous websites that carry a lot of premium themes but the one I use the most is Solostream because of their amazing variety of WordPress themes as well as their customer service. I’m currently using the WP-Clear and WP-Brilliance themes for my websites, but feel free to shop around and find one that suits YOU!
Tip 6: Check out the Live Demo of any given theme before purchasing it.
Tip 7: If you plan on using a large banner at the top of your website, be sure that large banners are compatible with the theme you choose. For example, I use a large banner with the WP-Brilliance theme and a small banner with the WP-Clear theme. You can always contact the developer of just about any theme and ask them about your banner size before purchasing as they all seem to have a quick response time to any questions you may have about that particular theme.
Tip 8: Search for WordPress tutorials. WordPress is arguably the biggest organization for websites and there are tens of thousands of free tutorials on websites as well as YouTube. We’re all in this together!
Before I let you go, here are a few website tips that took me a few years to learn:
- Search Engine Optimization. Be sure to list your keywords in the “Tags” section of the article you’re writing. This will help search engines find your article.
- Start a Facebook page based on your website.
- Add a Facebook Like Box widget to the sidebar of your website. People will be able to like and follow your Facebook page by having this widget on your website.
- Create a Youtube channel for your website. Make creative videos about the articles you’re writing. In the more info section of your video, be sure to include a full link to your website: e.g. //in5d.com/ or http://www.bodymindsoulspirit.com/. By doing so, it will create a “backlink” to your website and will make it easy for people to visit your website after watching your video. Additionally, Google may list your video on one of their first few pages if the right keyword is used in the title. This will bring additional traffic to your website.
Your website is always a work in progress, so try to learn as much as you can about being a webmaster. It’s really not that difficult to do and there are a lot of tutorials out there to help you figure out anything about your website. You may also want to research “SEO/Search Engine Optimization” for more ideas on how to get your page listed high on Google rankings.
I truly wish you the BEST of luck with your new website!
Sending you all infinite LOVE and Light!
Gregg
Click here for more articles by Gregg Prescott!
 Gregg Prescott, M.S., is the founder and editor of In5D and Zentasia. In 2009, Gregg launched In5D after experiencing what he describes as a “galactic download,” which provided him with the name “In5D” and the guidance to create the website. He co-owns In5D Club with his beautiful wife, Ali. His In5D Facebook page has over 370,000 followers, and his In5D YouTube channel has amassed 146,000 followers. Gregg is a visionary, author, a transformational speaker, and promotes spiritual, metaphysical and esoteric conferences in the United States through In5dEvents. Follow Gregg and In5D on various social media platforms, including Rumble, YouTube, Gab, Telegram, In5D Bitchute, Instagram, TikTok, Twitter, and TruthSocial to stay updated on his latest content and events./
Donate Crypto: https://cointr.ee/in5d
Image: Pixabay
In5D PATREON: Click here to help support our work thru Patreon. Your support is greatly appreciated!!!
Follow In5D on Patreon, Rumble, Telegram, Twitter, Bitchute, TikTok, Instagram, Facebook, YouTube, Gab, and Truth Social


